이전에 만들었던 플러터 앱 중에서 bottom navigation bar를 만들었던 것에 대해 작성해보려 한다.
bottom navigation bar를 만드는 방법에는 다양한 방법이 있으나
본인은 BottomNavigationBar 위젯을 사용하여 다른 페이지와 연결하는 하단바(탭)를 제작해보도록 하겠다.
1. BottomNavigationBar 만들기
https://api.flutter.dev/flutter/material/BottomNavigationBar-class.html
BottomNavigationBar class - material library - Dart API
A material widget that's displayed at the bottom of an app for selecting among a small number of views, typically between three and five. The bottom navigation bar consists of multiple items in the form of text labels, icons, or both, laid out on top of a
api.flutter.dev
해당 방법은 각 탭에 index 번호를 지정하여 표현할 수 있다는 장점이 있고 가장 통용되는 방법 중 하나이다.
단점이라면 탭에 애니메이션이 없다는 단점이 있으나 탭 애니메이션이 필요하지 않다면 해당 방법을 이용하는것에는 문제가 없다.
  int _selectedIndex = 0; // 선택된 페이지의 인덱스 넘버 초기화

  static const TextStyle optionStyle = TextStyle(
      fontSize: 30,
      fontWeight: FontWeight.bold
  ); // 텍스트 스타일 지정이므로 해당 부분은 제거해도 된다.

  final List<Widget> _widgetOptions = <Widget>[
    MySellPostPage(),
    MyPostPage(),
    MyPage(),
  ]; // 3개의 페이지를 연결할 예정이므로 3개의 페이지를 여기서 지정해준다. 탭 레이아웃은 3개.

  void _onItemTapped(int index) { // 탭을 클릭했을떄 지정한 페이지로 이동
    setState(() {
      _selectedIndex = index;
    });
  }
자세한 설명은 플러터 위에 링크된 플러터 공식 페이지를 참조하면 된다.
탭 인덱스 번호를 지정해주고, 리스트 위젯을 선언하여 각 탭을 클릭했을 떄 지정한 페이지로 이동하도록 한다.
@override
  Widget build(BuildContext context) {
    return Scaffold(
      body: SafeArea(
        child: _widgetOptions.elementAt(_selectedIndex),
      ),
      // bottom navigation 선언
      bottomNavigationBar: BottomNavigationBar(
        items: const <BottomNavigationBarItem>[
          BottomNavigationBarItem(
            icon: Icon(Icons.text_snippet),
            label: '나의 판매글',
          ),
          BottomNavigationBarItem(
            icon: Icon(Icons.home),
            label: '홈',
          ),
          BottomNavigationBarItem(
            icon: Icon(Icons.people),
            label: '마이페이지',
          ),
        ],
        currentIndex: _selectedIndex, // 지정 인덱스로 이동
        selectedItemColor: Colors.lightGreen,
        onTap: _onItemTapped, // 선언했던 onItemTapped
      ),
    );
  }
선언했던 bottomNavigationNar에 각 아이콘과 탭 레이블을 지정해준다.
1번째, 2번째, 3번째 인덱스에 해당하는 navigation 아이템을 지정해주었기 때문에
하단 탭에는 3개의 아이템이 표시되게 된다.
전체 소스코드
* (3개의 페이지는 따로 dart 파일을 만들어 연결시켜주면 된다.)
import 'package:flutter/material.dart';
import 'package:test/my_page.dart';
import 'package:test/my_post.dart';
import 'package:test/my_sell_post.dart';

/// This is the main application widget.
class MyApp extends StatelessWidget {
  const MyApp({Key? key}) : super(key: key);

  static const String _title = 'Flutter Code Sample';

  @override
  Widget build(BuildContext context) {
    return const MaterialApp(
      title: _title,
      home: MarketPage(),
    );
  }
}

class MarketPage extends StatefulWidget {
  const MarketPage({Key? key}) : super(key: key);

  @override
  State<MarketPage> createState() => _MarketPageState();
}

class _MarketPageState extends State<MarketPage> {

  int _selectedIndex = 0;
  static const TextStyle optionStyle = TextStyle(
      fontSize: 30,
      fontWeight: FontWeight.bold
  );

  final List<Widget> _widgetOptions = <Widget>[
    MySellPostPage(),
    MyPostPage(),
    MyPage(),
  ];

  void _onItemTapped(int index) {
    setState(() {
      _selectedIndex = index;
    });
  }

  // 메인 위젯
  @override
  Widget build(BuildContext context) {
    return Scaffold(
      body: SafeArea(
        child: _widgetOptions.elementAt(_selectedIndex),
      ),
      bottomNavigationBar: BottomNavigationBar(
        items: const <BottomNavigationBarItem>[
          BottomNavigationBarItem(
            icon: Icon(Icons.text_snippet),
            label: '나의 판매글',
          ),
          BottomNavigationBarItem(
            icon: Icon(Icons.home),
            label: '홈',
          ),
          BottomNavigationBarItem(
            icon: Icon(Icons.people),
            label: '마이페이지',
          ),
        ],
        currentIndex: _selectedIndex,
        selectedItemColor: Colors.lightGreen,
        onTap: _onItemTapped,
      ),
    );
  }

  @override
  void initState() {
    //해당 클래스가 호출되었을떄
    super.initState();

  }

  @override
  void dispose() {
    super.dispose();
  }

}
결과
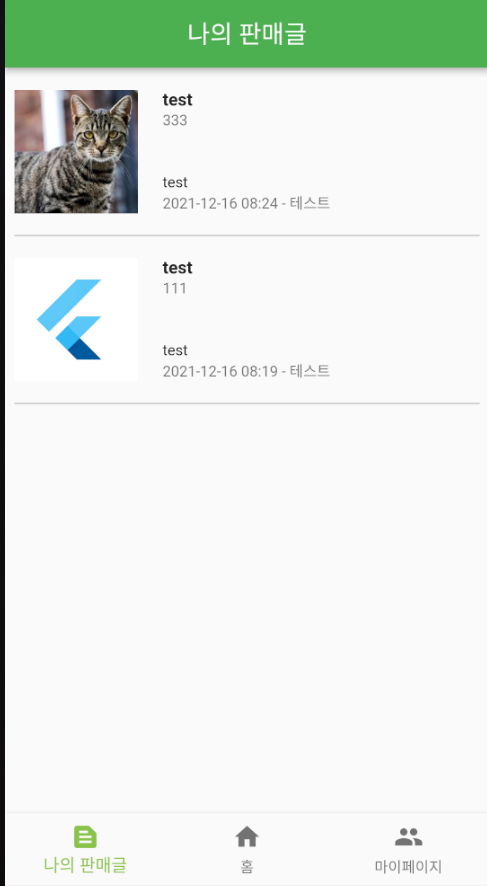
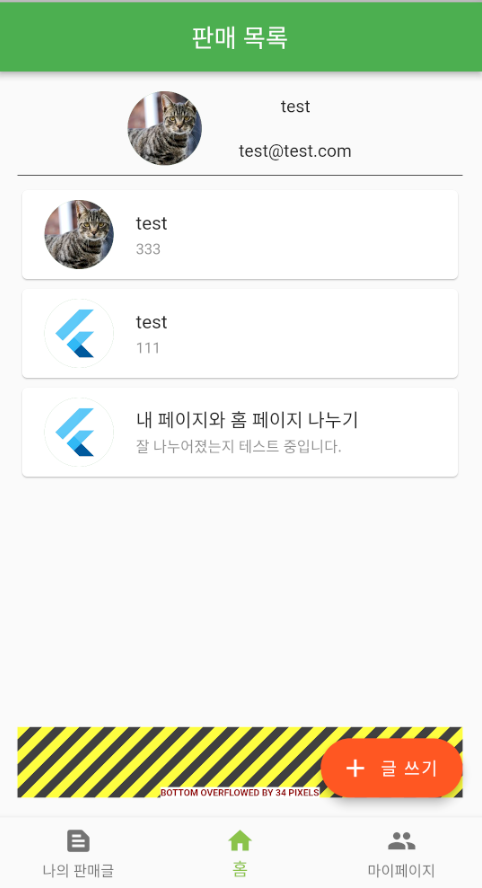
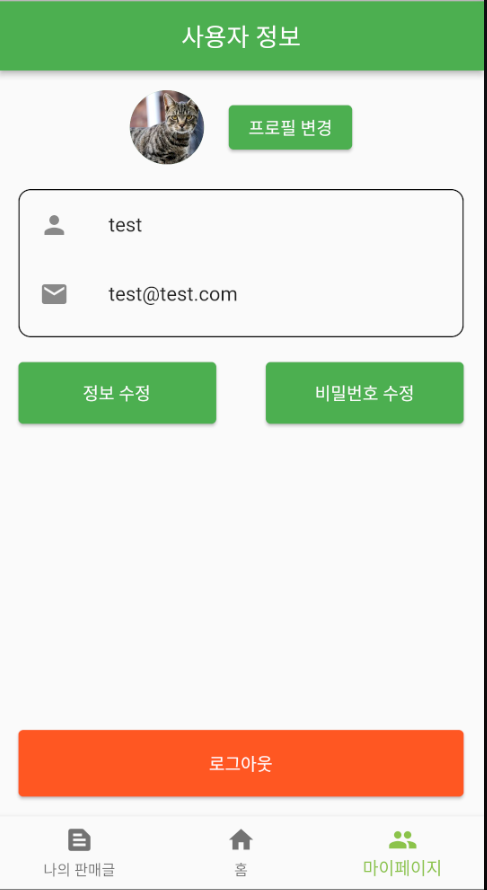
만들어둔 dart 페이지로 연결시킨 모습.
'개발 공부 > Flutter' 카테고리의 다른 글
| [Flutter]Flutter - 1. Firebase 로그인 구현하기 (0) | 2022.01.25 |
|---|---|
| [Flutter]Flutter 각종 오류 관련 - 추가 예정 (0) | 2022.01.21 |
| [Flutter/기본] Flutter - 위젯, 레이아웃 (0) | 2021.12.22 |
| [Flutter]1. Flutter 시작하기 (0) | 2021.12.18 |

