2024.09.16 - [Discord] - Discord Embedded App SDK 맛보기 - 1
앞선 글에서는 디스코드 Embedded APP SDK의 기초 프로젝트를 설정하는 방법까지 실행했다.
이번 포스트에서는 백엔드 설정 및 API 호출을 이용하여 액티비티에 출력하는 내용을 설명해보려 한다.
Discord Developer Portal — API Docs for Bots and Developers
Integrate your service with Discord — whether it's a bot or a game or whatever your wildest imagination can come up with.
discord.com
자세한 내용은 위 디스코드 개발자 포털 공식 문서를 참조한다.
1. 사용자 권한 부여 및 인증하기
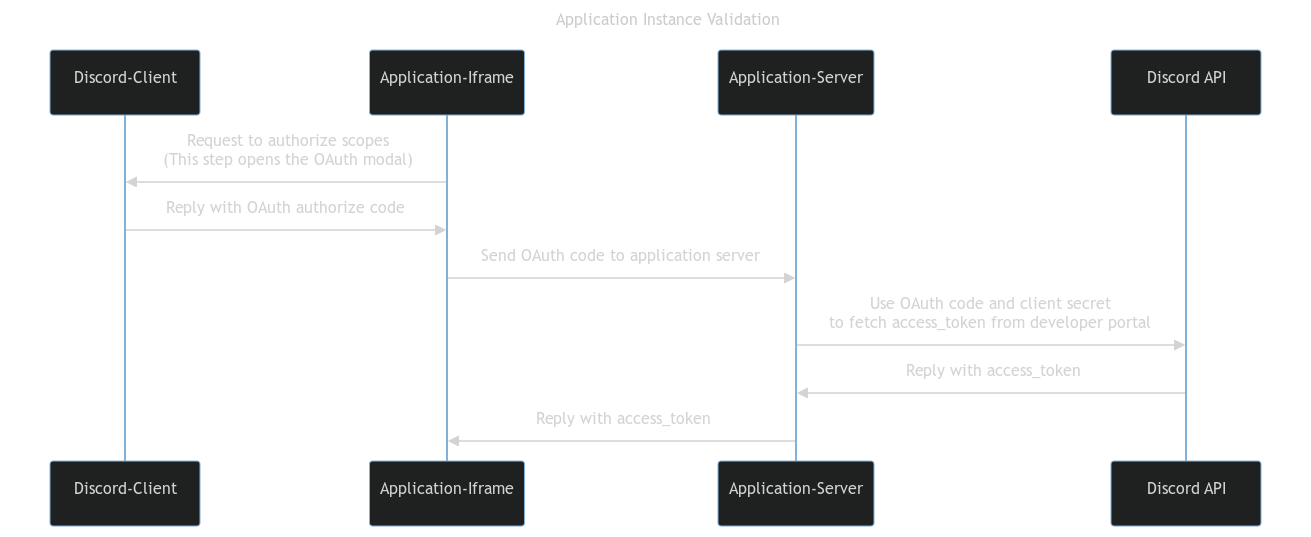
튜토리얼 프로젝트에서는 해당 패턴처럼 구현한다.
클라이언트 - 디스코드 활동 내 iframe -> 서버 -> API 를 거치는 방식을 사용하며 여기서는 iFrame에서 동작할 내용들을 작성한다.
좀 더 다양한 패턴을 확인하려면 아래 페이지를 확인한다.
프론트엔드:
embedded-app-sdk-examples/discord-activity-starter/packages/client/src/main.ts at main · discord/embedded-app-sdk-examples
Examples for the Embedded App SDK. Contribute to discord/embedded-app-sdk-examples development by creating an account on GitHub.
github.com
백엔드:
embedded-app-sdk-examples/discord-activity-starter/packages/server/src/app.ts at main · discord/embedded-app-sdk-examples
Examples for the Embedded App SDK. Contribute to discord/embedded-app-sdk-examples development by creating an account on GitHub.
github.com
1. server 폴더에 npm 설치 및 실행
# move  into our server directory
cd server

# install dependencies
npm install

# run server
npm run dev

> server@1.0.0 dev
> node server.js

Server listening at http://localhost:3001
2. 클라이언트에서 백엔드 서버 호출
// getting-started-activity/client/main.js
import { DiscordSDK } from "@discord/embedded-app-sdk";

import rocketLogo from '/rocket.png';
import "./style.css";

// Will eventually store the authenticated user's access_token
let auth;

const discordSdk = new DiscordSDK(import.meta.env.VITE_DISCORD_CLIENT_ID);

setupDiscordSdk().then(() => {
  console.log("Discord SDK is authenticated");

  // We can now make API calls within the scopes we requested in setupDiscordSDK()
  // Note: the access_token returned is a sensitive secret and should be treated as such
});

async function setupDiscordSdk() {
  await discordSdk.ready();
  console.log("Discord SDK is ready");

  // Authorize with Discord Client
  const { code } = await discordSdk.commands.authorize({
    client_id: import.meta.env.VITE_DISCORD_CLIENT_ID,
    response_type: "code",
    state: "",
    prompt: "none",
    scope: [
      "identify",
      "guilds",
      "applications.commands"
    ],
  });

  // Retrieve an access_token from your activity's server
  // Note: We need to prefix our backend `/api/token` route with `/.proxy` to stay compliant with the CSP.
  // Read more about constructing a full URL and using external resources at
  // https://discord.com/developers/docs/activities/development-guides#construct-a-full-url
  const response = await fetch("/.proxy/api/token", {
    method: "POST",
    headers: {
      "Content-Type": "application/json",
    },
    body: JSON.stringify({
      code,
    }),
  });
  const { access_token } = await response.json();

  // Authenticate with Discord client (using the access_token)
  auth = await discordSdk.commands.authenticate({
    access_token,
  });

  if (auth == null) {
    throw new Error("Authenticate command failed");
  }
}

document.querySelector('#app').innerHTML = `
  <div>
    <img src="${rocketLogo}" class="logo" alt="Discord" />
    <h1>Hello, World!</h1>
  </div>
`;
해당 코드를 작성하고 실행하면 Discord에 권한을 부여해달라는 메시지가 출력된다.
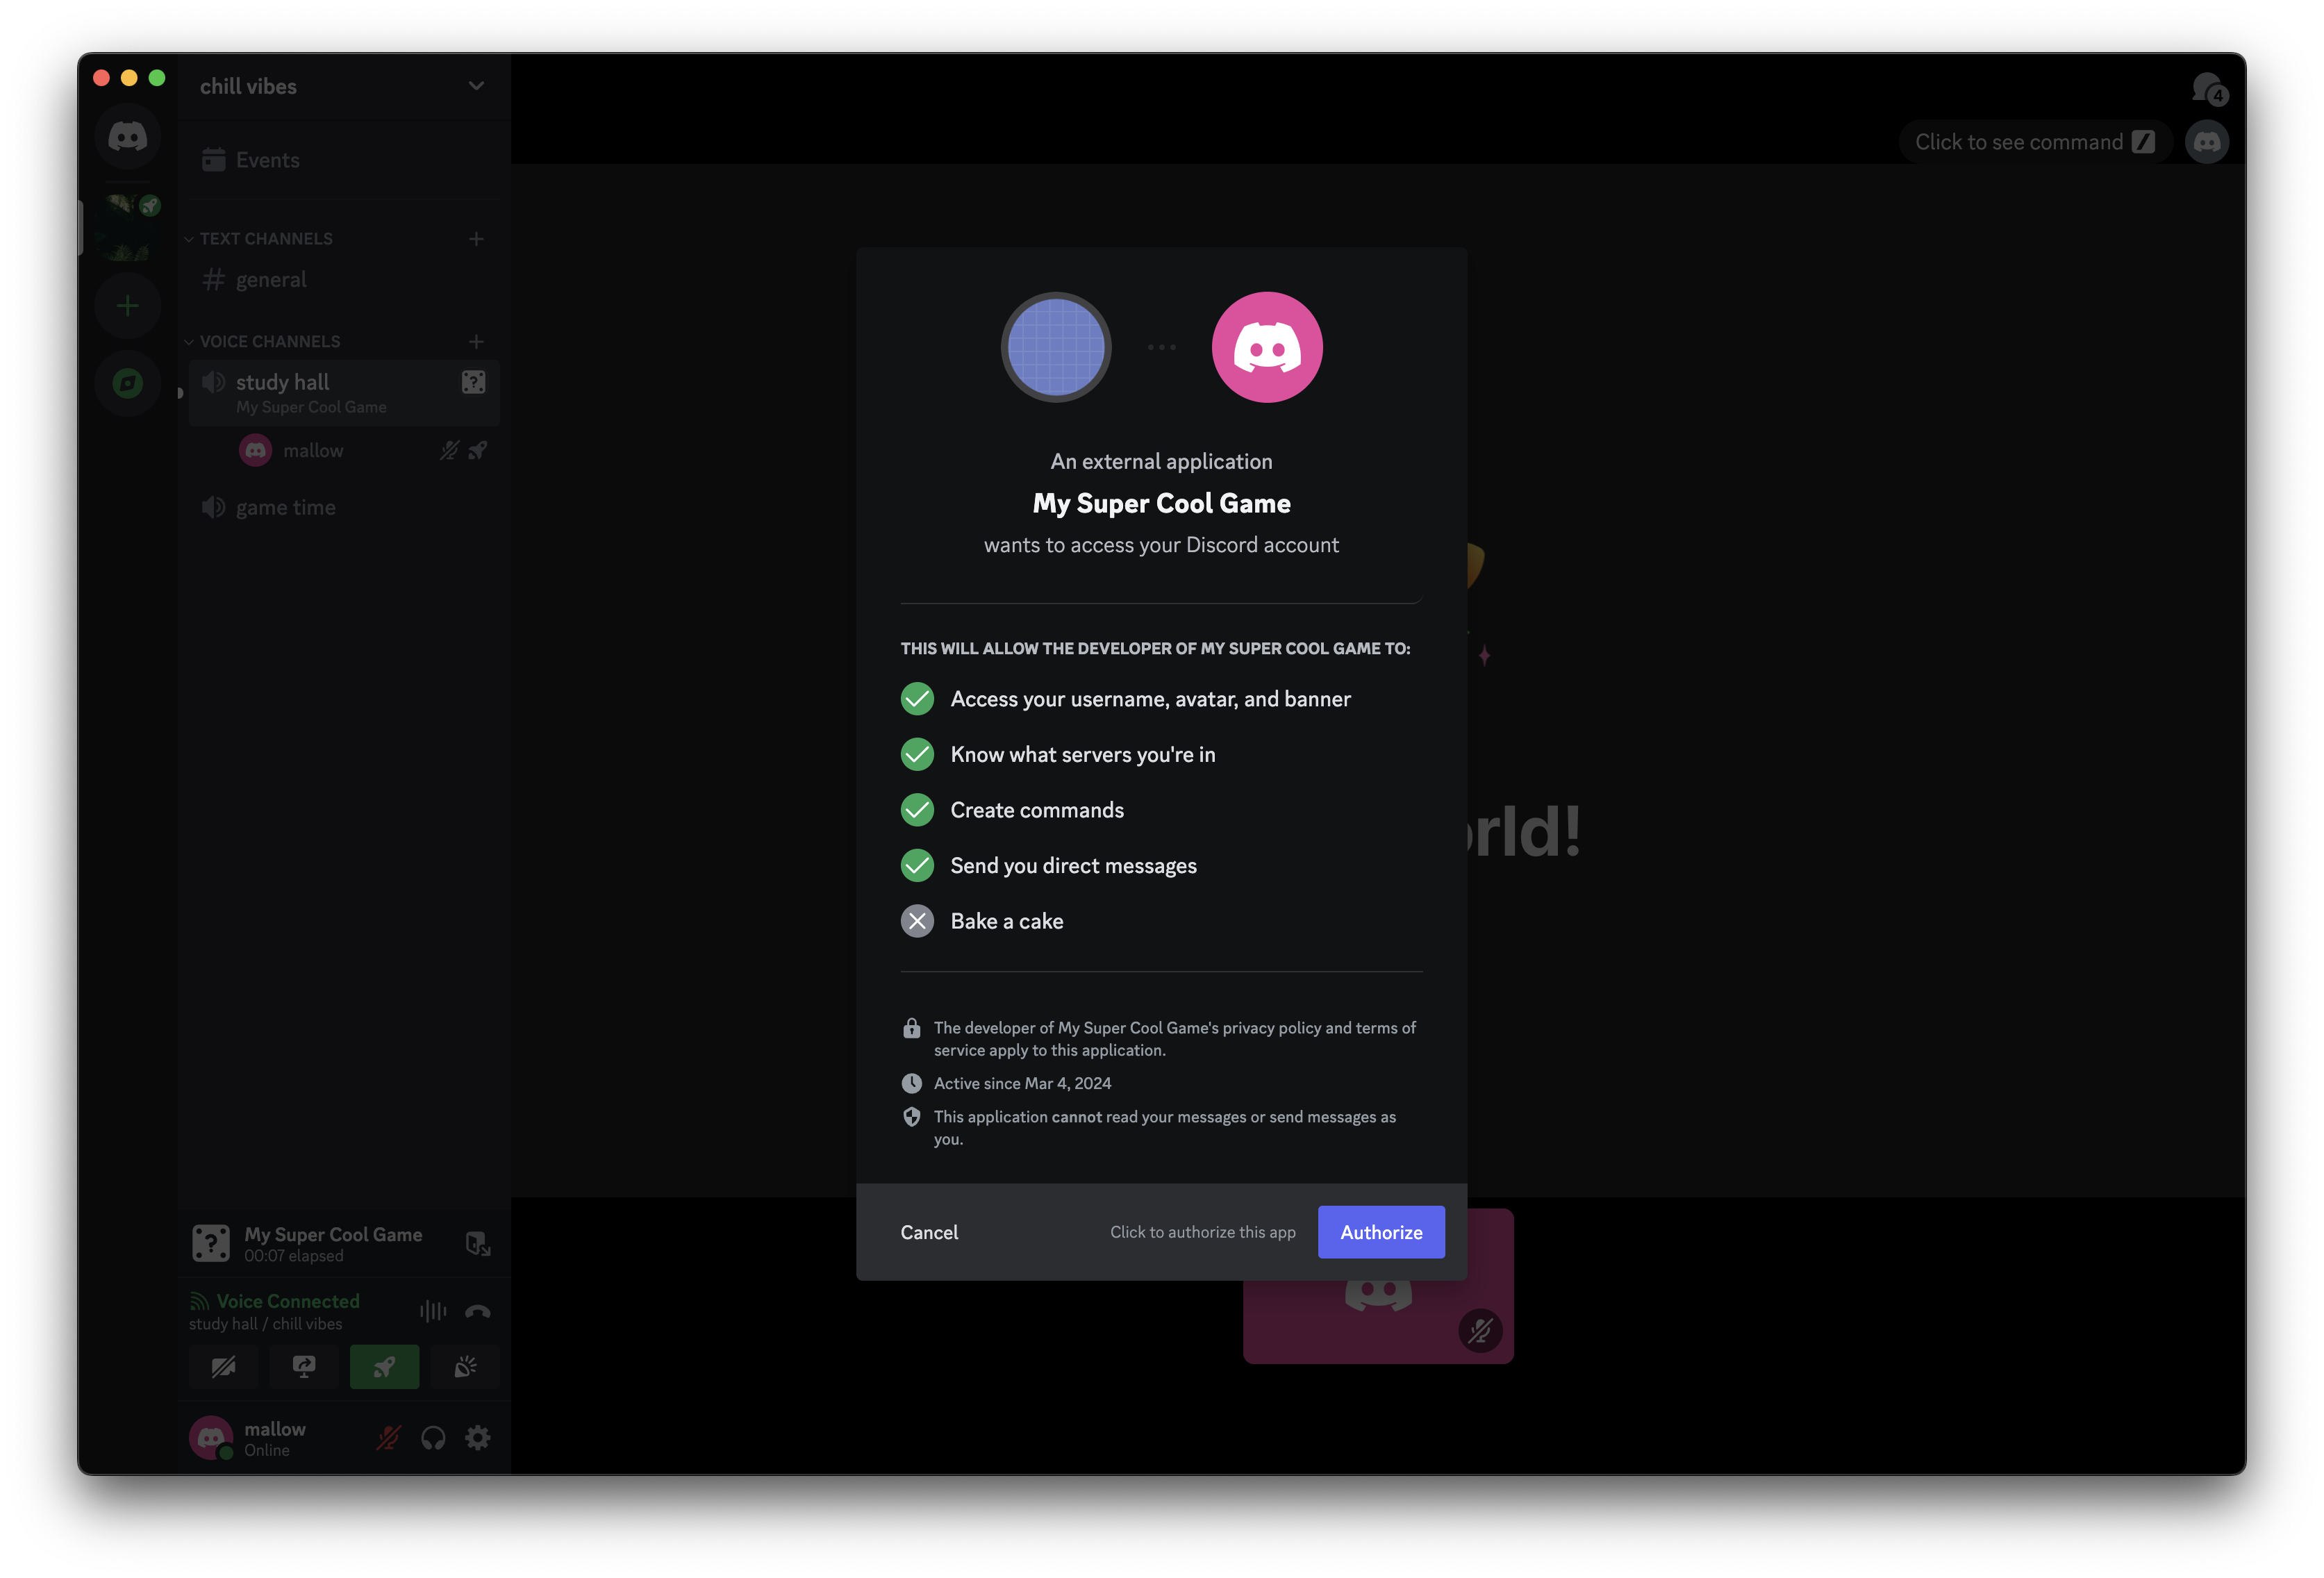
Authorize 버튼을 클릭하여 권한을 부여하고 다음으로 진행한다.
2. SDK를 사용하여 채널 가져오기
사용자를 인증했기 때문에 Discord 클라이언트에서 여러가지 정보를 가져오거나 사용할 수 있다.
아래 내용은 SDK를 사용하여 활동이 실행 중인 음성 채널에 대한 세부 정보를 얻는 코드를 작성한다.
//getting-started-activity/client/main.js

...

setupDiscordSdk().then(() => {
  console.log("Discord SDK is authenticated");

  appendVoiceChannelName();
});

...

async function appendVoiceChannelName() {
  const app = document.querySelector('#app');

  let activityChannelName = 'Unknown';

  // Requesting the channel in GDMs (when the guild ID is null) requires
  // the dm_channels.read scope which requires Discord approval.
  if (discordSdk.channelId != null && discordSdk.guildId != null) {
    // Over RPC collect info about the channel
    const channel = await discordSdk.commands.getChannel({channel_id: discordSdk.channelId});
    if (channel.name != null) {
      activityChannelName = channel.name;
    }
  }

  // Update the UI with the name of the current voice channel
  const textTagString = `Activity Channel: "${activityChannelName}"`;
  const textTag = document.createElement('p');
  textTag.textContent = textTagString;
  app.appendChild(textTag);
}
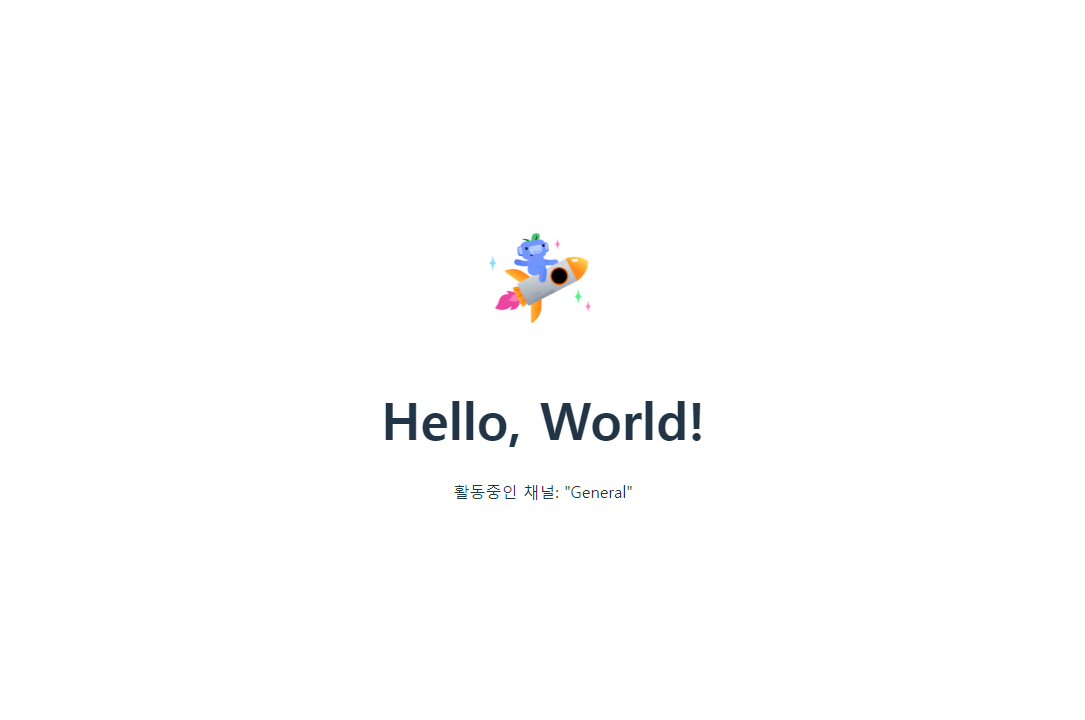
위와 같이 코드를 작성하고, 액티비티를 실행하면 앱에 내가 입장한 음성 채널의 이름이 표시되는 것을 볼 수 있다.
7. API를 사용하여 길드 정보 가져오기
다음 코드에서는 아래의 정보를 가져온다.
- /users/@me/guilds 엔드포인트와 auth.access_token을 이용하여 현재 소속된 길드 목록을 가져온다.
- discordSdk에 정의된 내용을 기반으로, 각 길드를 반복해서 탐색해 자신이 속한 길드를 찾는다.
- 마지막으로 길드 아바타를 포함하는 새로운 HTML 이미지 요소를 만들어 애플리케이션에 추가할 수 있다.
//getting-started-activity/client/main.js
...
setupDiscordSdk().then(() => {
  console.log("Discord SDK is authenticated");

  appendVoiceChannelName();
  appendGuildAvatar();
});
...
async function appendGuildAvatar() {
  const app = document.querySelector('#app');

  // 1. From the HTTP API fetch a list of all of the user's guilds
  const guilds = await fetch(`https://discord.com/api/v10/users/@me/guilds`, {
    headers: {
      // NOTE: we're using the access_token provided by the "authenticate" command
      Authorization: `Bearer ${auth.access_token}`,
      'Content-Type': 'application/json',
    },
  }).then((response) => response.json());

  // 2. Find the current guild's info, including it's "icon"
  const currentGuild = guilds.find((g) => g.id === discordSdk.guildId);

  // 3. Append to the UI an img tag with the related information
  if (currentGuild != null) {
    const guildImg = document.createElement('img');
    guildImg.setAttribute(
      'src',
      // More info on image formatting here: https://discord.com/developers/docs/reference#image-formatting
      `https://cdn.discordapp.com/icons/${currentGuild.id}/${currentGuild.icon}.webp?size=128`
    );
    guildImg.setAttribute('width', '128px');
    guildImg.setAttribute('height', '128px');
    guildImg.setAttribute('style', 'border-radius: 50%;');
    app.appendChild(guildImg);
  }
}
코드를 다시 실행하고, 활동을 다시 시작하면 현재 속해있는 서버의 아이콘이 화면에 렌더링된다.

'Discord' 카테고리의 다른 글
| Discord Embedded App SDK 맛보기 - 1 (1) | 2024.09.18 |
|---|
